Unofficial-Ink-Cookbook
Unofficial Ink Cookbook
Chapter 12: Ink for the Web
- Chapter 12: Ink for the Web
Summary: In this chapter, you will learn more about the Ink for Web option, how it works, and special tags that can be used as part of Ink for Web.
Ink for Web
So far in this book, Ink was shown running as part of Inky Editor. There is also another option for running Ink, Ink for the Web!
As part of the Ink Editor, a website version of the Ink code can be created using the File → “Export for web…” option.

Figure 1: File -> Export for web… menu option
When using the Inky Editor, code written in Ink can be exported for the web. When used in this way, a compiled Ink project can be played in a web browser and shared on websites for others to see.
When used for the first time with a project, Inky will save the project based on the file name, creating a folder based on what is inputted in the Save As field.
Folder Organization
Inside the exported project folder will be five files: index.html, ink.js, main.js, style.css, and nameOfProject.js.
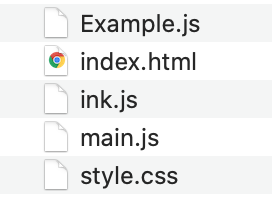
Figure 2: MacOS X File Structure
-
index.html: Combines the story, engine, and CSS code to be run in a web browser. -
ink.js: Ink engine code. -
main.js: JavaScript code to feed the story into the Ink engine code and process player interactions in the browser. -
style.css: CSS rules for the story. -
Example.js: Story compiled into a JSON format and set to the value of a variable.
To play the project locally, open the index.html file in a web browser. It should appear as it did in the editor view, but with the name of the project included at the top.
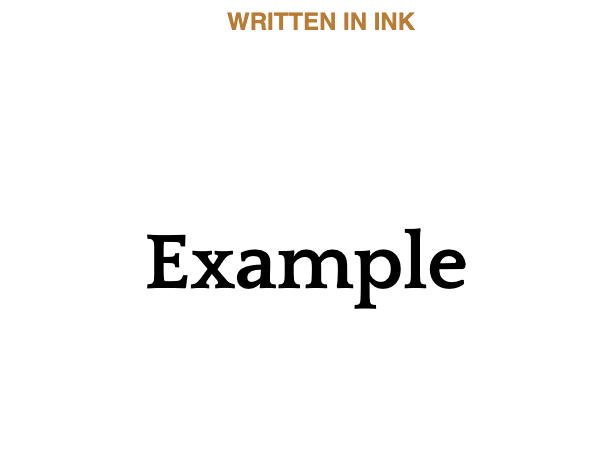
Figure 3: Running in Browser
Editing Files
To prepare a project for others to play, two files are more important than the others: index.html and style.css. Unfortunately, these two files will be replaced each time the Export to Web process is completed!
When editing the style.css file (to change CSS rules), use the “Export story.js only…” option from the File menu and select the nameOfProject.js file to replace only that file each time.
Using Images
Starting with release version 0.10, the Inky editor has the ability to build versions of Ink for the web with images using a new tag: # IMAGE.
Reminder: When used in Inky, tags are created using the hash symbol,
#, and then additional instructions.
The image tag is used with the capitalized word IMAGE and a colon. Images are then referenced either in the current directory or with a relative path in relation to the index.html file.
Note: A relative path is a term meaning a location of a file that is not absolute. A relative path includes symbols like the period,
.and slash,/. These define the location of a file in relation to another.
The vast dunes stretch off into the horizon. # IMAGE: dunes.png
In the above example, the file dunes.png has a relative path of the same folder as the index.html file. It would be loaded by the Ink for Web option.
Images Do Not Appear in Inky Preview
When used in the Inky editor, tags will appear as-is within the preview area. Images will not be loaded or shown.

Figure 4: Image Tags in Preview
To see the images, use either File –> Export to Web (for first time exporting) or File –> “Export story.js only…” (for additional exporting).
The reason for this is simple: the # IMAGE tag is just that, a tag. Ink, and Inky by extension, simply records tags and saves their values. It does not process them. It is the Ink for Web functionality that is processing the image tag and adding the image to the final, HTML output.
The following code would show only that a tag was being used, not load the image:
Code:
The vast dunes stretch off into the horizon. # IMAGE: dunes.png
Output:
The vast dunes stretch off into the horizon.
Meta Instructions
Along with understanding code commands, the tagging system in Inky also allows for more meta instructions like author, theme, clear, and restart.
Author
The author tag allows for adding an author to the project. Once added, the “author” area will appear under the title in the web version.
# author: Jane Doe

My life really began after I died.
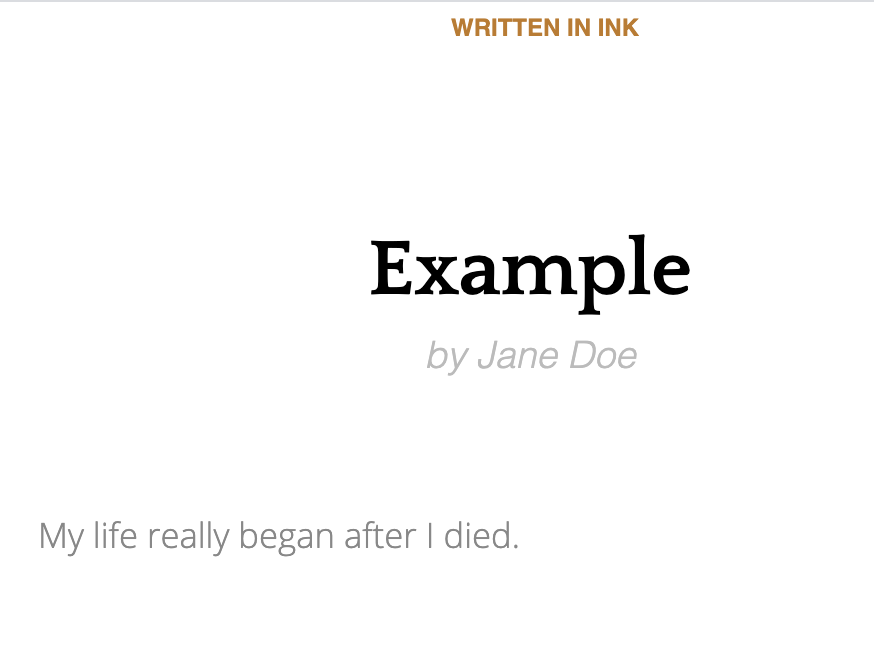
Figure 5: Author Tag
Note The author tag is always written in lowercase as
# author.
Theme
By default, the “theme” (CSS style rules) is set to “white”. As with other tags, including the keyword “theme:” and a new choice will change it. Version 0.10 introduced a new theme option: dark.
# theme: dark

The rain pounded on the windows. Its staccato pace matched my own heart as its unsteady beat echoed each other. I had seen a ghost -- or, at least, I thought I did. Could this house really be haunted?
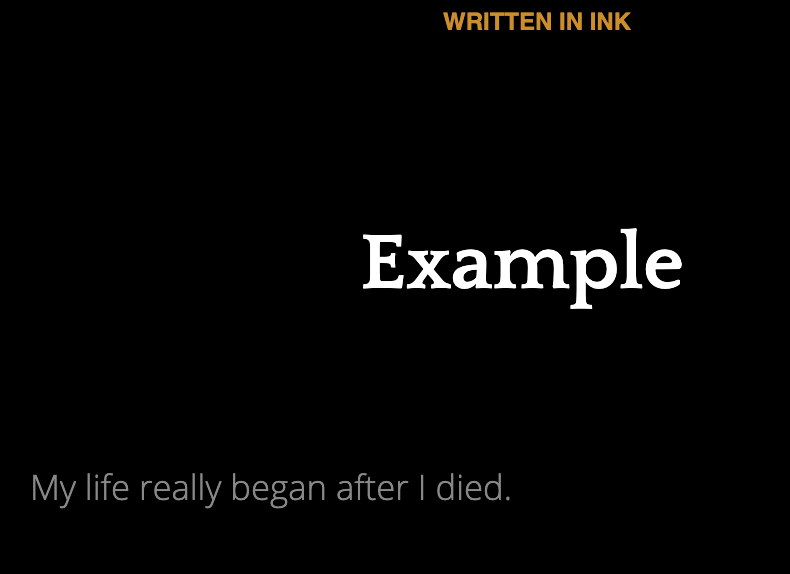
Figure 6: Theme Tag
Note The author tag is always written in lowercase as
# theme.
Clear
While other instructions change code properties, # CLEAR works only in the web-export version. It “clears” all other instructions and starts at the top of the screen with the next set of instructions.
Note
# CLEARshould usually only be used after the player has made a choice. If used in the middle of a flow, it will clear all the text before the player has a chance to read it!
You enter the commands in the console and pause before pressing the last key.

* Press Last Key
  # CLEAR
  The screen flashes before resetting. Were you successful?

Figure 7: Clear Tag
Note The clear tag is always written in uppercase as
# CLEAR.
Restart
Like # CLEAR, # RESTART also only works in the web-exported version of Ink. Instead of removing things, however, # RESTART does as its name implies: it restarts the project.
Note: Like
# CLEAR, it is best to use# RESTARTafter the player has made a choice, since it clears all the text on the screen as well.
You pick up the treasure. After many trials and challenges, you have finally come to the end of your journey.

* Restart?
  # RESTART
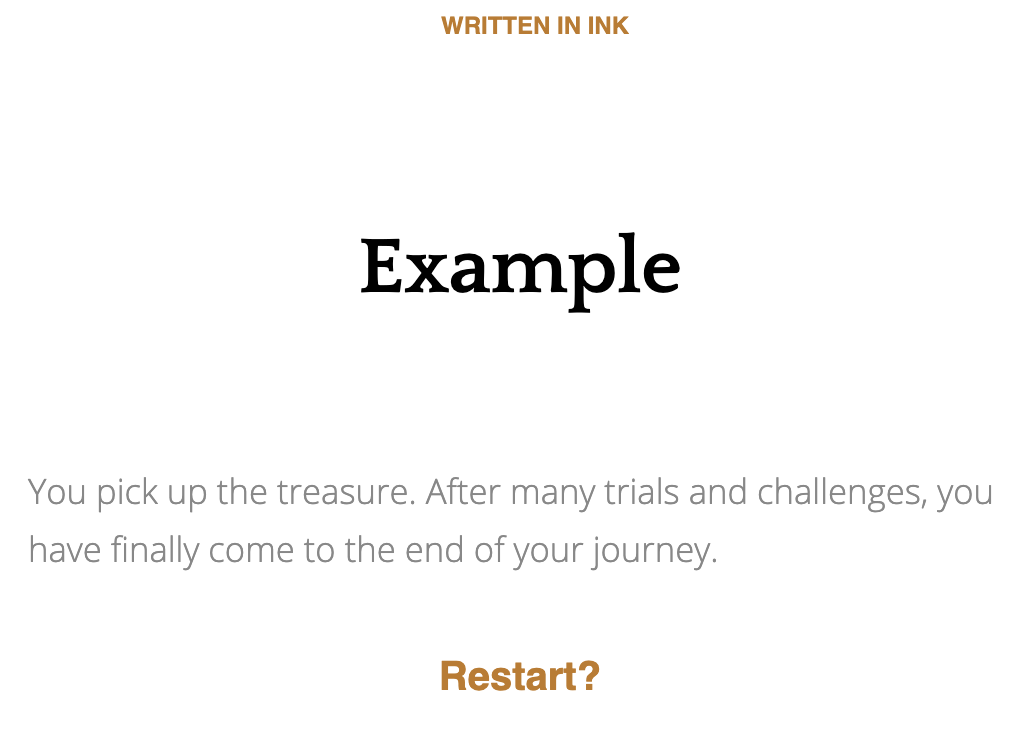
Figure 8: Restart Tag
Note The Restart tag is always written in uppercase as
# RESTART.
Adding CLASS
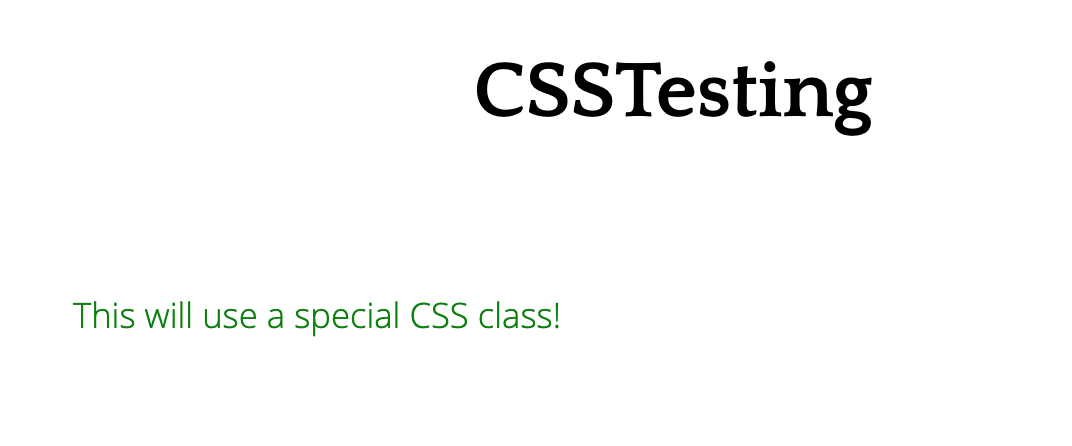
Like with working with the # IMAGE tag, Ink/Inky also supports a tag for defining new CSS rules: # CLASS.
When used at the end of a line, the Inky web-exported version will apply any CSS classes matching that name from its style.css file.
Adding or changing rules in this file will be reflected when the index.html file is refreshed in the web browser.
Example Ink:
This will use a special CSS class! # CLASS: green
Example Addition to style.css:
.green {
  color: green;
}
Example Presentation:
Note: When adding a new
# CLASStag in a project, it will need to be exported again before those changes will appear.Be sure to use File –> “Export story.js only…” and replace the story before refreshing the
index.htmlfile!
Changing CSS
The default CSS can also be updated adding new declarations or changing the existing content in the style.css file.
Note: A story will need to have gone through the “Export to web” process at least once to generate a
style.cssfile. This can then be edited in another program or editor.
Adding New Declarations
It make a class for larger text, a new class, biggerText, could be added to the bottom of the style.css file with new CSS declarations.
Note: A declaration is the official name for what is commonly known as a “CSS rule.”
It is written in the format of
property: valuewith a known property on the left-hand side, a colon,:, and then the value to update. This format declares a property to have a certain new value.
.biggerText {
  font-size: 1.5em;
}
After add a new class biggerText, it can be used with the # CLASS tag.
"WHAT!?" you shout. "THIS IS A SUPER IMPORTANT PART AND THE FONT IS LARGER THAN NORMAL." # CLASS: biggerFont
Note: Instead of using “Export to web” a second time, the menu option “Export story.js only…” should be used.
This will export a new
story.jsfile (where “story” is replaced with the name of the project. Select the existingstory.jsfile and replace it.
When run in a browser, the HTML produced would be the following:
<p class="biggerFont">"WHAT!?" you shout. "THIS IS A SUPER IMPORTANT PART AND THE FONT IS LARGER THAN NORMAL."
</p>
Changing Existing CSS
Any of the existing CSS declarations can be changed in the style.css file. Changing the rules for the p selector, for example could make the text bigger for all output shown.
Note: In CSS, a selector is what is used to “select” what content in a HTML document should be affects by its declarations. There are many different forms of selectors, but a common usage is to find all of the elements of a certain type.
For example, using the selector
pwould find all of the<p>elements in a document and apply certain style rules.
Finding the p selector in the style.css file shows the following declarations in its block.
p {
    font-size: 13pt;
    color: #888;
    line-height: 1.7em;
    font-weight: lighter;
}
Adjusting the font-size to a larger value, for example, would make the font larger for all usages of the <p> element in the HTML document.
p {
    font-size: 15pt; /* Updated value! */
    color: #888;
    line-height: 1.7em;
    font-weight: lighter;
}
Note: In the above example, the use of
/* */marks a comment in CSS. This is different than Ink!In CSS, comments begin with
/*and end with*/. The use of the double-slash format used in Ink,//, is not allowed in CSS.
Any additional rules or changes can be made to the style.css file. However, two things need to be remembered:
1) Making changes in Inky means doing a File –> “Export story.js only…” before refreshing the index.html file to see those changes.
2) Tags work on sections of text. When used after a selection of text on the same line, it will wrap that text in those styles. Otherwise, tags will work on the next section of text.
Built-In CSS Classes
.end
The class .end, as explained in the style.css file, can be used for changing how the presentation of the text “The End” (or any other story ending) appears.
/* Built in class if you want to write:
     The End # CLASS: end
*/
.end {
  text-align: center;
  font-weight: bold;
  color: black;
  padding-top: 20px;
  padding-bottom: 20px;
}

.dark .end {
  color: white;
}
.byline
When the # author: name tag is used, its content is placed in an element with the class of “byline”.
.byline {
  font-style: italic;
}
.choice
All choices are given the class “choice” by default. Changes to the .choice and .choice a will affect how choices (and their hyperlinks) appear to players.
.choice {
  text-align: center;
  line-height: 1.7em;
}

/* first choice */
:not(.choice) + .choice {
  padding-top: 1em;
}


.choice a {
  font-size: 15pt;
}
Working with HTML
Along with using text in Inky, it is also possible to use HTML directly. Style elements such as <strong> and <em> can be used within the editor and their effects will show up in the preview pane.
Note: In HTML, the element
<em>is used to give some selection emphasis.The
<strong>element gives a selection strong emphasis.
While the styling of elements must happen through CSS rules, any HTML that has a structural or styling factor can be used in Inky and “passed through” to the Ink for Web usage as well.
Example.ink:
"But that's an <em>alien</em> woman!" she shouted. "How can you love her!?"

"I don't care where she came from," you reply. "<strong>I love her!</strong>"
Example Preview in Inky:

This means that text can be arranged within the Inky Editor through using HTML directly, too.
<table>
  <tr>
    <td>Yes.</td>
    <td>It</td>
    <td>is possible to do things like this.</td>
  </tr>
</table>
<h1>And this?</h1>
Inline CSS and Choices
Normally, all of the choice text in the story will appear the same way. Even with changing the styling of all of the choice text in a story by editing the rules of .choices in the style.css file, they would appear the same. Every individual choice would be styled in the same way, which can be somewhat limiting.
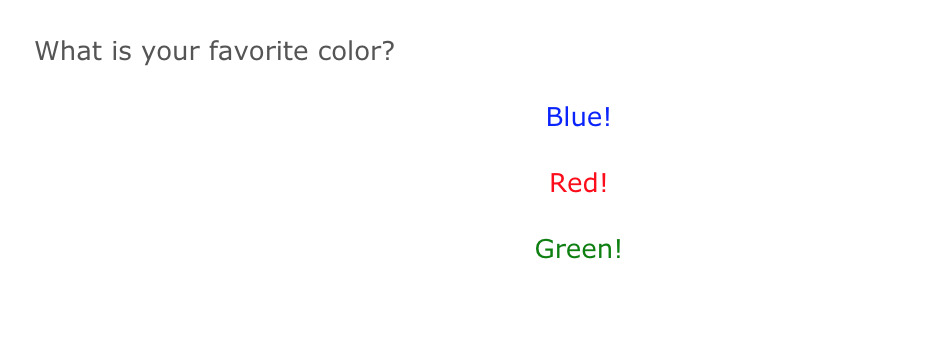
Luckily, there is a workaround within Ink to style individual choices! This workaround involves using inline CSS within the text of a choice to change the styling of that individual choice. Using the attribute style inside of an element, in-line CSS can be applied.
Note: In HTML, anything inside of the opening tag of an element is an attribute. These define settings and values that affect the structure or presentation of the element.
The style attribute can contain CSS declarations that will be applied only to that single element.
Consider the following example:
What is your favorite color?

+ <p style="color:blue;">Blue!</p>
  -> DONE

+ <p style="color:red;">Red!</p>
  -> DONE

+ <p style="color:green;">Green!</p>
  -> DONE
Example Inky Preview:
Try It
The examples in this chapter demonstrate how you can use Ink’s web features to create stories that you can easily share on a website.
Many of these features rely on knowledge of HTML or CSS that is not fully covered in this book, but this chapter provides some basic examples that should get you started, even if you have never worked with those languages before. While there are plenty of resources online to help you learn HTML and CSS, it is also worth learning how such code works inside the Inky editor, as well as learning about Ink’s specialized web features.
We suggest completing the following practices exercises. Before beginning on them, we recommend that you choose a story you have created from one of the exercises in a previous chapter, though you can create a new story if you wish.
-
Add author information to your story and apply the dark theme to it using Ink’s specialized web features. Remember that you won’t be able to see these things in the Ink editor: you will only see them once your story has been exported for the web.
-
Find an appropriate visual for your story and use the image feature to add it. Again, keep in mind that you will not be able to see the image until the story is exported. (Remember to place this image in the folder created by the “Export for web” option or in a relative path to the folder.)
-
Add at least two HTML elements to your story. If you have never used HTML, try the
<strong>and<em>examples shown earlier in the chapter. You should be able to see them in the Inky editor, so you can quickly determine if you have done it correctly or not! -
(Optional) If you have used CSS before, add at least two of Ink’s CLASS tags to your story. If you have not used CSS before, you can skip this step.
-
Export your story for the web and view the resulting story in a web browser. Make sure the image from #2 above is in the same folder as your exporter story, and if you completed the optional #4 step, edit the stylesheet with the relevant CSS changes.